

Graphitint pencils are tinted water-soluble graphite pencils built by Derwent. I’m utilizing them this 7 days to problem my contemplating about colour and system.
Experimenting with new materials is a fantastic way to expose unexplored options in your get the job done. I’ve worked with Graphitint pencils before, and locate the complete strategy of h2o-soluble drawing materials fascinating. It is been a obstacle for me to embrace them fully, having said that, because I’ve formulated a mentality and way of working with classic materials that I can depend on and provide relatively predictable results. What you will see in this write-up is the 1st phase to greater understanding these special pencils and new prospects with coloration.
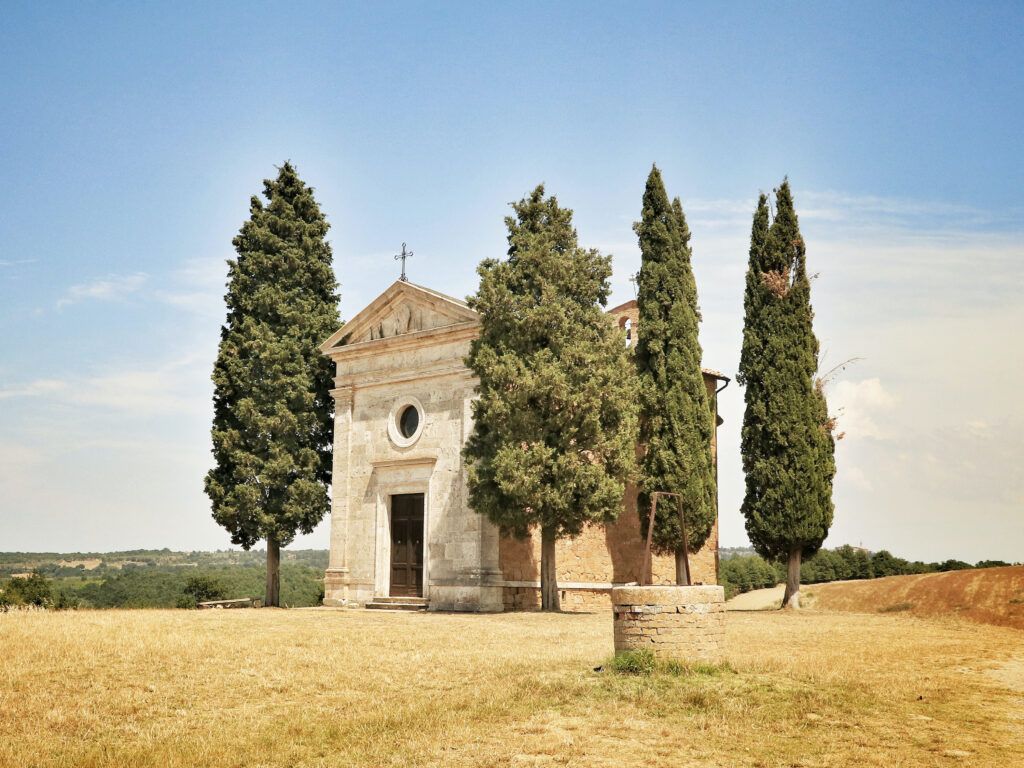

Preliminary Clean
What I did: I evenly designed the outlines of the key styles, and then made use of “Ocean Blue #07,” to flippantly layer the sky, distant hills, trees, and shadow shapes. With a #10 brush loaded with h2o, I washed the region and permit it dry.
What I’d Do In a different way: See the uneven spots in the sky? This is due to the fact my brush was much too small and I was not ready to provide an even wash to the whole sky space in one move. On the following try out, I’d use a greater #14 watercolor brush, which would maintain far more water and let me to operate the complete place in just one attempt.

Mid-Tones
What I did: I applied “Green Grey #09” for the distant hills, “Ivy #11” to block the mid-tones for the trees, and “Chestnut #13” for the red shadow places. The #10 Sable Brush worked very well to create an initial wash and build light-weight textural brushwork. After the initial wash dried, I used a layer of dried pencil to create a dried textured impact on the tough tooth of the paper.
What I’d Do In another way: The shade in the distant hills is not producing the effect I would have favored. Presented a next check out, I would produce a stronger original layer of “Sky Blue #07.” This would produce far more atmospheric distance. In the shadow spots of the making, I would use “Cool Brown #13.”
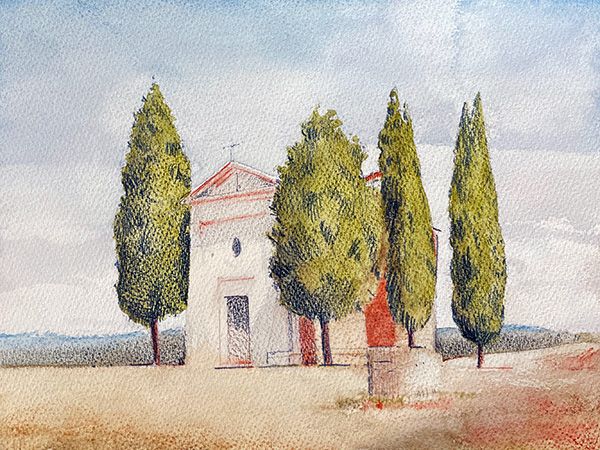
Last Examine
What I did: I employed a clean of “Sage #12” on the floor and chapel to advert heat. Detail, texture, and shadow was additional making use of hatching with a dry “Shadow #05” pencil.
What I’d Do In different ways: The reddish shadow parts are as well robust, so I would get started with a more powerful layer of “Sage #12” and a lighter layer of “Chestnut #13” to suggest the shadows.
What Was Uncovered
Graphitint on watercolor paper is a compelling pairing. The resulting impression has a persuasive light high-quality and texture, but I need to improved fully grasp the colors and how to layer them efficiently. I get pleasure from setting up layers of hatch marks and details on top of the coloured washes and look ahead to doing the job even more with these supplies!